Art is hard. I have a lot of respect for people who can do art in a professional capacity, as my level of drawing has barely evolved past stick figure drawings. I used to tell myself that there was no way that I was an artist and that the skills needed to draw were something that I wouldn’t be able to learn.
Well, at this point I still can’t draw. But I took a baby step to becoming more comfortable with art, and started to learn about the mechanics of pixel art in particular.
Why Pixel Art?
I am but one person working on a passion project game. Making a 3D game wasn’t on the list of necessities for my grand idea, so I settled on making a 2D game instead. (One less dimension means one less way for things to go wrong, or so my thinking went.) With that choice made out of the box, I had to figure out a tool to create pixel art, and a very popular choice for that is Aseprite.
Aseprite
Aseprite is a dedicated pixel art tool available for artists. I’ve made this my main tool for editing sprites, and I really enjoy the functionality of it. Animation frames, palette control, and pixel perfect drawing is all included, which makes it very convenient for pixel artwork.
The tool is inexpensive at $20, and can be downloaded for free if you have know-how about compiling from Github. However, other free alternatives for art exist that can also create pixel art, such as GIMP (a Photoshop alternative) and Krita (a free painter’s tool).
What to Avoid with Pixel Art
It doesn’t matter what tool you use if you don’t manage to avoid the pitfalls of creating pixel art. There a few main things you want to avoid when creating pixel art. (And if you want to know more, I highly recommend checking out Pixel Logic: A Guide to Pixel Art).
Jaggies
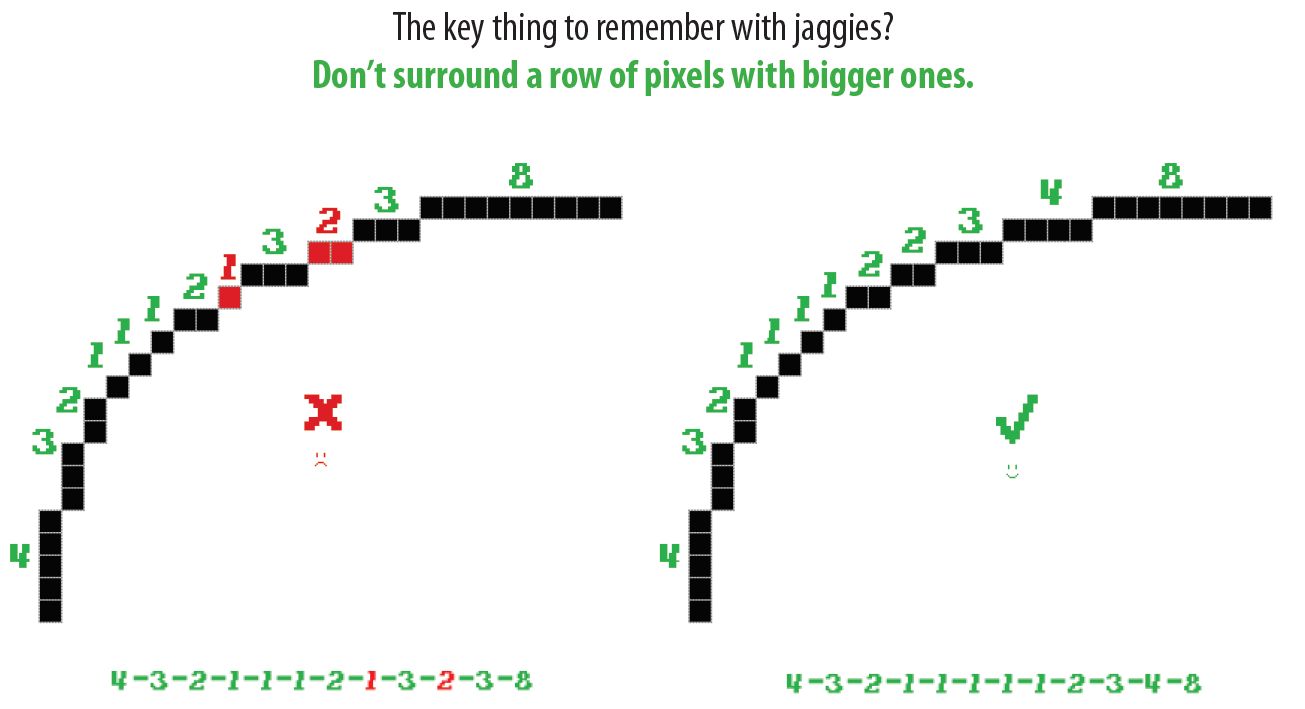
When you draw in such a small scale, you need to watch out for how your lines are constructed, or else the line will look clunky. Jaggies occur when the length of lines makes a line you want to appear smooth look jagged instead. An example of what this looks like and how to fix it is below:

Banding
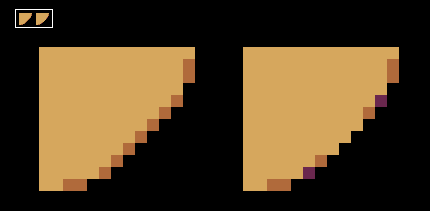
Banding happens when you try and shade an image perfectly around its border. This was something I intuitively did when I first started working with images and it made my art rough around the edges. Again, an example of what this looks like and how to avoid it is below. The biggest thing with banding is to try shading with different colors to avoid things looking blurry when zoomed out.

Anti-Aliasing
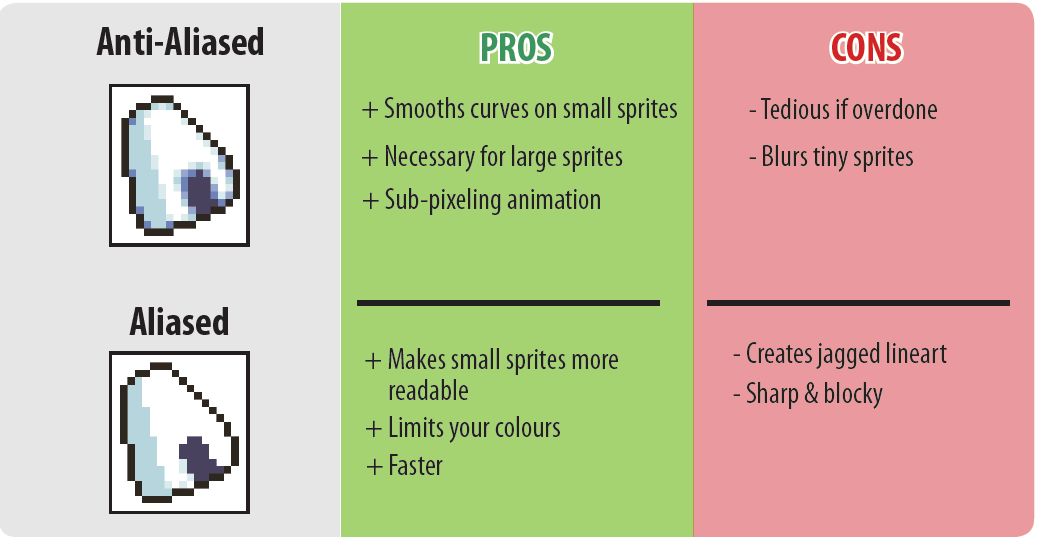
The last point I found interesting in my pixel art journey (though there are many things) is anti-aliasing. It’s a technique meant to make pixel art easier to decipher by blurring pixels around a color transition. There are pros and cons to using anti-aliasing, so it depends on the specific sprite you’re working on whether or not you want to employ the technique.

Conclusion
Overall, there’s a lot of layers to trying to create pixel art that I haven’t even touched on in this post. But much like any skill, the more it’s practiced, the easier it gets to do.